
As the vibrant colors of autumn leaves begin to fall, many people see them as a nuisance to be raked up and discarded.
But gardeners know that these fallen leaves hold the potential to become something far more valuable: leaf mold, also known as “gardener’s gold.”
By transforming leaves into leaf mold, you can create a nutrient-rich soil conditioner that improves soil health, structure, and moisture retention—all without spending a dime.
In this guide, we’ll walk you through the step-by-step process of making leaf mold and show you how this simple technique can benefit your garden year after year. Let’s turn those autumn leaves into gold for your garden!
What is Leaf Mold?
Leaf mold is a natural soil amendment made from the decomposition of leaves over time. Unlike regular compost, which relies on bacteria to break down a mix of “green” and “brown” materials, leaf mold is produced through fungal decomposition.
This slower process results in a dark, crumbly material that’s rich in organic matter and beneficial for your garden.
Benefits of Leaf Mold:
- Improves Soil Structure: Leaf mold helps loosen compacted soil, improves drainage in clay soils, and adds structure to sandy soils.
- Increases Moisture Retention: It can hold up to 500 times its weight in water, making it a fantastic natural mulch that keeps your soil hydrated.
- Encourages Beneficial Microorganisms: The decomposition of leaves attracts beneficial fungi, earthworms, and microorganisms, which contribute to healthy, fertile soil.
- Free and Sustainable: Making leaf mold reduces waste and turns a free, natural resource into a valuable garden amendment.
Step-by-Step Guide to Making Leaf Mold
Making leaf mold is a simple and low-maintenance process that requires minimal effort and just a bit of patience.
Follow these easy steps to turn your autumn leaves into gardener’s gold:
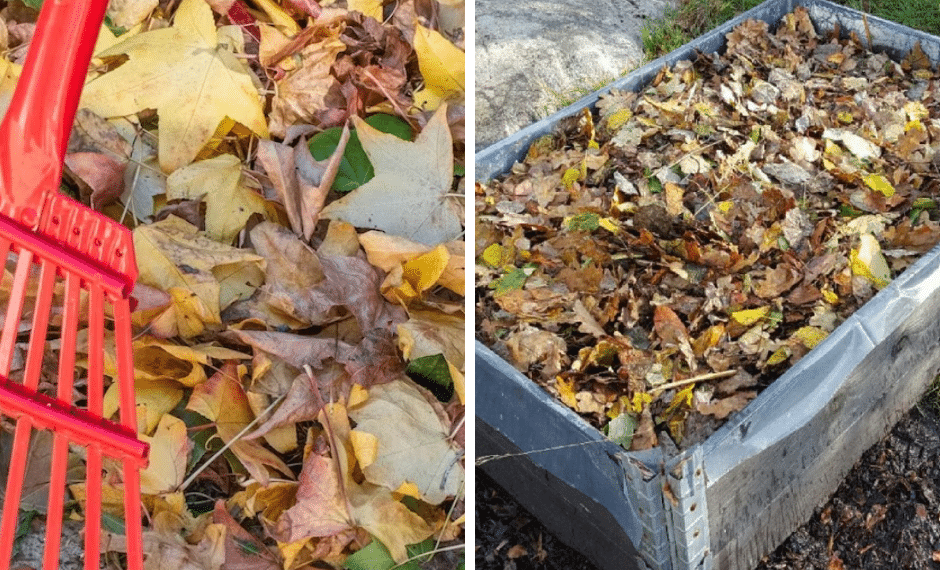
Step 1: Gather and Prepare the Leaves
Collect as many fallen leaves as you can. You can rake them up from your yard or gather them from other areas (with permission) to build your supply.
Tips for Collecting Leaves:
- Collect leaves that are free of disease or chemical treatments.
- Avoid including large amounts of pine needles, as they take longer to decompose and may create acidic leaf mold.
- For best results, shred the leaves using a lawn mower or leaf shredder to speed up the decomposition process. Shredded leaves break down faster because they have more surface area for fungi to act on.
Step 2: Choose a Location and Create a Leaf Pile or Bin
Decide where you’ll be making your leaf mold. You can either create a simple leaf pile or use a leaf mold bin, which is an enclosed area specifically designed to hold leaves.
Creating a Leaf Pile:
- Choose a shaded spot in your garden to prevent the leaves from drying out too quickly.
- Pile up the leaves in a loose heap, ensuring good air circulation.
Building a Leaf Mold Bin:
- Use wire mesh, wooden pallets, or a large plastic container with holes drilled in the sides for airflow.
- Form a circular or square shape, about 3-4 feet wide, and add your leaves inside.
- If you have limited space, you can use large black plastic bags: add leaves, moisten them, tie the bag, and poke a few holes for ventilation.
Step 3: Moisten the Leaves
Moisture is essential for leaf mold production, as it helps fungi break down the leaves. When creating your pile or filling your bin, moisten the leaves with water to create a damp environment.
How to Moisten Leaves:
- Use a garden hose or watering can to lightly spray the leaves as you build the pile.
- Check the moisture level every few weeks and add more water if the leaves feel dry.
Tip: The pile should feel like a damp sponge—moist but not soggy.
Step 4: Let the Fungi Do the Work
Now that your leaves are piled up and moistened, it’s time for nature to take over. Leaf mold is created through the action of fungi, which slowly break down the leaves over time.
How Long It Takes:
- Depending on your climate and the type of leaves used, leaf mold can take anywhere from 6 months to 2 years to fully decompose.
- You can speed up the process by turning the pile every few months, which helps aerate the leaves and promote faster decomposition.
Tip: If using a plastic bag, shake the bag every couple of months to ensure even decomposition.
Step 5: Harvest and Use Your Leaf Mold
Once the leaves have decomposed into a dark, crumbly, soil-like material, your leaf mold is ready to use. It should have a pleasant, earthy smell and a fine texture.
How to Use Leaf Mold:
- As a Mulch: Spread leaf mold around your garden beds to help retain moisture, suppress weeds, and protect plant roots.
- As a Soil Conditioner: Mix leaf mold into the soil to improve its structure, enhance moisture retention, and increase the amount of organic matter.
- In Potting Mixes: Combine leaf mold with compost, perlite, or other ingredients to create a nutrient-rich potting mix for container plants.
Tip: Store any extra leaf mold in a covered bin or bag to use throughout the year.
Additional Tips for Making Leaf Mold
- Use a Variety of Leaves: Mixing different types of leaves can result in a more balanced and nutrient-rich leaf mold.
- Avoid Weeds and Invasive Plants: Exclude any leaves or plant material from invasive species or weeds that could spread seeds or rhizomes in your garden.
- Cover the Pile in Dry Conditions: If you live in a dry climate, cover your leaf pile with burlap or a tarp to maintain moisture.
Turning autumn leaves into leaf mold is an eco-friendly and cost-effective way to enhance your garden’s soil health.


: Eat for a Healthier Heart")


